# Angularのライブラリを作成し、GitHub Packagesで共通化、複数のAngularプロジェクトで使用する
Table of Contents
はじめに
Angularで複数のプロジェクトを作成している。基本的なデザインシステムがあるのでそれを各プロジェクトで使用したいのだが、プロジェクトごとで二元管理をしたくないので、submoduleを使用していたんだけど、運用が面倒なのでGitHub Packagesに移行することにした。
Angularでライブラリを作成しGitHub Packageで公開するメモを書いておく。
Angularライブラリとは
まずそもそそもAngularのLibraryとは、
Angularライブラリは、コンポーネント、サービス、ディレクティブなどの再利用可能なコードをまとめたパッケージです。これらは単独で実行することはできず、Angularアプリケーションにインポートして使用されます。
とのこと。
GitHub Packagesとは
そしてGitHub Packagesとは
GitHub Packagesは、コンテナやその他の依存関係を含むソフトウェアパッケージをホストおよび管理するためのプラットフォームです。ソースコード管理とパッケージ管理を同じGitHub上で一元化できる点が大きな特徴です。
とのこと。
GitHub Packagesの利用シーン
GitHub Packagesの利用シーンとしては、
組織内でのみ共有したい非公開のライブラリやコンポーネントを、npmやDocker Hubのような外部サービスではなく、GitHub内で安全にホストしたい場合。
ちなみにnpmパッケージも非公開で公開できるらしい。
ただ有料らしいので、制限付きとはいえ無料で非公開設定ができるという点では、GitHub Packagesの方が有用そうだった。
GitHub Packagesの制限
制限は
- ストレージ容量:500 MB
- データ転送量:1 GB/月 (月間)
とのこと。
利用枠的にUIコンポーネントを共有する分にはなんの問題もない気がする。
Angularライブラリの作成
まずはAngularのUIライブラリーを作成する。
user@nameMacBook-Air filename % ng version
     _                      _                 ____ _     ___    / \   _ __   __ _ _   _| | __ _ _ __     / ___| |   |_ _|   / △ \ | '_ \ / _` | | | | |/ _` | '__|   | |   | |    | |  / ___ \| | | | (_| | |_| | | (_| | |      | |___| |___ | | /_/   \_\_| |_|\__, |\__,_|_|\__,_|_|       \____|_____|___|                |___/

Angular CLI: 19.2.19Node: 22.7.0Package Manager: npm 10.8.2OS: darwin arm64
Angular:...
Package                      Version------------------------------------------------------@angular-devkit/architect    0.1902.19 (cli-only)@angular-devkit/core         19.2.19 (cli-only)@angular-devkit/schematics   19.2.19 (cli-only)@schematics/angular          19.2.19 (cli-only)
バージョンとか前提はこんな感じだった。
プロジェクトの作成
ng new angular-ui-component --no-create-applicationこのコマンドでアプリケーション自体を作成せずにAngularの箱を作成する。
ライブラリの生成
ng generate library ui-library --prefix=ui次にライブラリを作成する。
--prefix=uiを書くことでui-buttonのように接頭辞をつけることができる。
このコマンドを実行することで、projects/ui-libraryフォルダができる。
このsrc/lib以下にコンポーネントを作成していく。
コンポーネントの作成
例えばButtonコンポーネントを作成するのであれば、
ng g component buttonCREATE projects/ui-library/src/button/button.component.css (0 bytes)CREATE projects/ui-library/src/button/button.component.html (21 bytes)CREATE projects/ui-library/src/button/button.component.spec.ts (592 bytes)CREATE projects/ui-library/src/button/button.component.ts (213 bytes)でコンポーネントを作成する。
public-api.tsへの登録
作成できたら外部に公開する要素の定義をするために、public-api.tsに登録する。
export * from "./lib/button/button.component";GitHub Packagesへの公開準備
これでライブラリの準備はできたので次にGitHub Packagesを使用する準備をする。
package.jsonの修正
projects/ui-library/package.jsonを修正する。
{ "name": "@nove-b/angular-ui-component", "version": "0.0.1", "publishConfig": { "registry": "https://npm.pkg.github.com/" },}パッケージ名にGithubのアカウント名を入れるようにする。
Personal Access Tokenの発行
次にPersonal Access Token (Classic)を発行する。
この時に、スコープ選択で write:packages (パッケージのアップロード用) と
read:packages (ダウンロード用) にチェックを入れて生成する。
.npmrcの設定
Tokenの発行ができたら公開をするために、.npmrcをルートに作成する。
秘匿情報を入れるのに.ignoreする。
npm login --scope=@nove-b/angular-ui-component --registry=https://npm.pkg.github.com# Username: nove-b# Password: ghp_xxxxxxxxxx(Personal Access Token (Classic))ライブラリのビルドと公開
これで公開の準備が整ったので、ライブラリをビルドする。
ライブラリのビルド
angular-ui-component % ng build ui-libraryこれでbuildファイルができるので、公開する。
ライブラリの公開
cd dist/ui-librarynpm publishなぜかうまくいかなかったのでコマンドから試みる。
user@NamenoMacBook-Air ui-library % npm login --scope=@nove-b --registry=https://npm.pkg.github.comnpm notice Log in on https://npm.pkg.github.com/Username: nove-bPassword: Personal Access Token (Classic)
Logged in to scope @nove-b on https://npm.pkg.github.com/.user@NamenoMacBook-Air ui-library %
これでログインできたので公開する。
npm publish
...
npm notice Publishing to https://npm.pkg.github.com/ with tag latest and default access+ @nove-b/angular-ui-component@0.0.1
無事に公開できた。
ライブラリの使用
次にこれを使用してみる。
まずはまたAngularのアプリケーションを作成するけど、そこら辺は割愛する。
で、立ち上げた。

これにさっきのライブラリを呼び出すようにする。
使用するアプリケーションでの.npmrcの設定
まずはルートに.npmrc を作成する。
@nove-b:registry=https://npm.pkg.github.com///npm.pkg.github.com/:_authToken=ghp_xxxxxxxxxx(Personal Access Token (Classic))ライブラリのインストール
次にインストールする。
npm install @nove-b/angular-ui-component@0.0.1コンポーネントのインポートと使用
インストールが完了したら使用するコンポーネントファイルにインポートする。
import { ButtonComponent } from '@nove-b/angular-ui-component';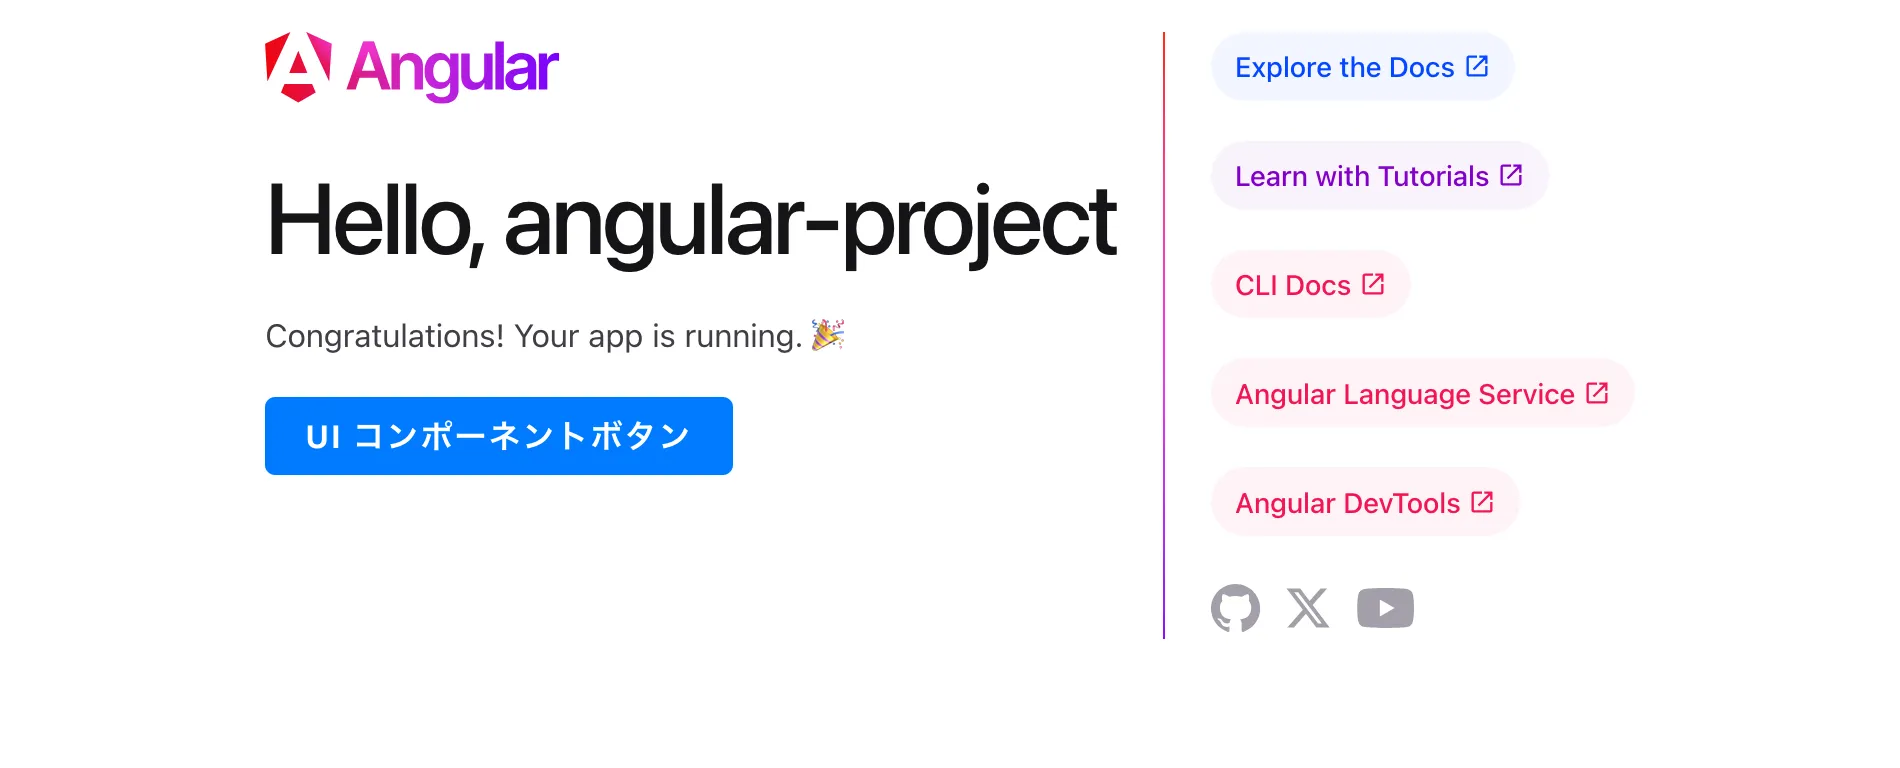
@Component({ selector: 'app-root', imports: [RouterOutlet, ButtonComponent], templateUrl: './app.component.html', styleUrl: './app.component.scss'})<div style="margin-top: 20px; margin-bottom: 20px;"> <ui-button [label]="'UI コンポーネントボタン'"></ui-button></div>これ画面で確認できた。
まとめ・考察
組織の場合はTokenとかどういう運用になるんだろう。今は個人でやっているので、個人のTokenを使っているけれど、みたいな疑問もあるけれど、社内システムのUIコンポーネントとかを作成しておき、cssを上書きできるようにしておけばすごい汎用性高そうだ。
まあ、社内システムにAngularを使うかというと微妙なところなので、せめてvue、reactでAngularライブラリのような仕組みがあればいいかもしれない。
あるいはvanilla jsにするかというところか。
せめて
vue、reactでAngularライブラリのような仕組みがあればいいかもしれない。
組み込みではないっぽい。組み合わせできるっぽいので今度挑戦してみたい。